I’m constantly asked for advice on burnt bowls, wispy smoke, harsh sessions and lacking flavor. The answer I give is almost universally, “check your heat management”. That seems like a vague answer because there are so many different factors that go into managing a session but the following are the big ones.
- Size of the bowl
- Type of charcoal
- Size of the charcoal pieces
- Number of the coals used
- Coal placement
- Thickness of the foil
- Wind cover usage
Heat management is really a balancing game. Too hot and it burns the tobacco resulting in harsh smoke and burnt flavors. Too cool and the volatile components won’t vaporize resulting in dull flavor or weak smoke. For the purposes of this article all of my suggestions will be based around using square coconut charcoal or disk shaped quick lights as those are the two most common types on the market. I’d love to discuss natural lump charcoal but the pieces are too variable in size and density to give general advice.
Let’s jump right in.
Choosing The Right Type of Coal
There are two basic types of coals: Natural Coals and Quick Light Coals. You can refer to the natural coals vs. quick light coals article to learn more about them but natural coals tend to burn slower and with a little less heat making them easier to manage and less likely to scorch the tobacco.
I prefer natural charcoal for many reasons but this is a big one along with the lack of starter chemicals.
Choosing The Right Number of Coals
The number of coals you need depends on the size of your bowl and the size of the charcoal pieces. The following chart is a good place to start but it will take some fiddling to find the right combination that works with the bowl you’re using. In this chart I refer to using half pieces of charcoal, which you can find more information about in our guide to splitting coconut charcoal. The same advice works for QL coals but it’s even easier if a bit messier.
| Small Bowl | Medium Bowl | Large Bowl | |
| Small Coal | 2 | 3 | 4 |
| Medium Coal | 1.5 (three halves) | 2 | 3 |
| Large Coal | 1 (two halves) | 1.5 (three halves) | 2 |
It’s always a good idea to start with less charcoal and add more if you need it. It’s easier to add heat than it is to recover burnt tobacco.
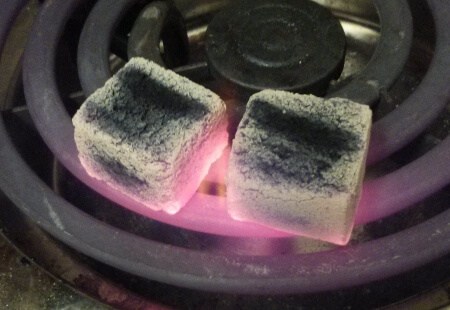
Coal Placement
Start your hookah by putting the coals on the edge of the bowl. I actually let them hang off the edge a bit as this keeps the coals a bit farther away from the tobacco to start and allows the bowl to heat up slowly and evenly rather than shocking the tobacco right off the bat. Remember that foil sags and tobacco expands as it heats up, so starting the coals in the center of your bowl makes direct contact between the coals and the tobacco much more likely. That means scorching. That means bad times.
If you are using 2 coals put them across from each other. If you are using 3 coals make a triangle with them. 4 coals follows suit. Just make sure that they are equidistant to evenly distribute heat.
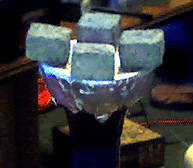
Coal Rotation
After the coal has been on one spot for 10 to 15 minutes it’s usually time to move it. The tobacco underneath has been well cooked and the rest of the bowl needs some attention. Drop the coal lightly in the tray to knock off the ash, flip it over and place it on the space that was previously unoccupied. There is fresher tobacco under the new spot and this helps to cook the bowl more evenly.
It’s not entirely necessary and I know some people who leave their coals in one spot for the entire session without even tapping off the ash. It’s a matter of personal preference but always a good idea if your smoke is tasting a little burnt. Give the spent tobacco a chance t cool down.
With each rotation I usually move the coals inward a little bit. As they burn down the heat they produce lessens and they need to be closer to the tobacco to heat it effectively. The fresher tobacco toward the center will revitalize the smoke and keep the session going.
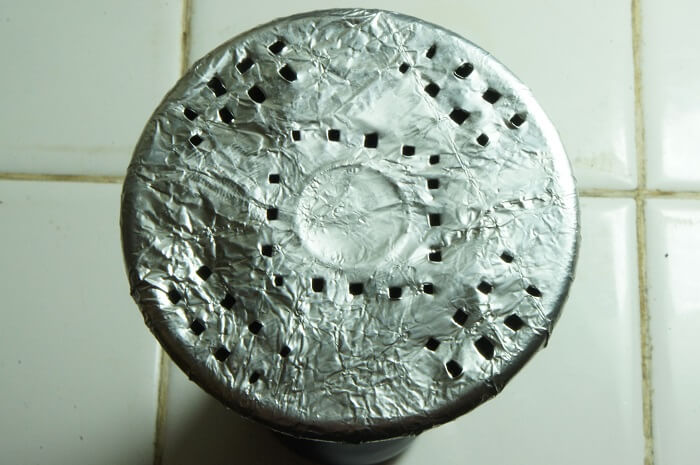
Foil
I almost always use two layers of regular aluminum foil. One layer tends to be a bit thin and allows a lot of heat to reach the tobacco quickly. That’s actually good for some brands and styles of tobacco but it’s usually to much too soon and causes a burnt session. To simplify things I’ve been known to use Heavy Duty Foil. This is another one of those factors that changes with the tobacco you’re smoking. Just remember that the thinner the foil means more heat is reaching the tobacco directly and you’ll need a little less charcoal. More layers of foil (or HD foil) will buffer the heat a bit more and make the bowl less likely to burn but you’ll need more charcoal to get it up to smoking temperature.
Again, it’s a balancing game.
Using a Wind Cover
Wind covers are great. They concentrate heat and can help you use less charcoal. If a session feels a bit weak but you think another coal will cause a burn the wind cover will bump up the heat just a bit. If it feels like it’s getting too hot you can take the wind cover off for fine tuning on the fly. It’s not a completely necessary accessory but it’s a big part of my heat management routine and well worth having on hand for all sessions.
Hi.
Nice article but I wanted some more information on coal placement. I start a large bowl with 3 coconut coals sitting next to each other on the bowl. When the bowl reaches a good temperature I usually knock one off and keep 2 coals next to each other. I rotate them all around the bowl but never have them in triangle formation or opposite each other. Is there any advantages/disadvantages you know when using my method? Reason I do it is because I think to myself that the rest of the bowl doesn’t cook and only the side I’m using does. Where as triangle formation would heat the whole bowl and result in a shorter session?
Hope you can elaborate on this matter.
Regards
Yaqub
In my country (South Africa) we only get the round wheel type quick light coal. Any guides/Suggestions on heat managements on these types?